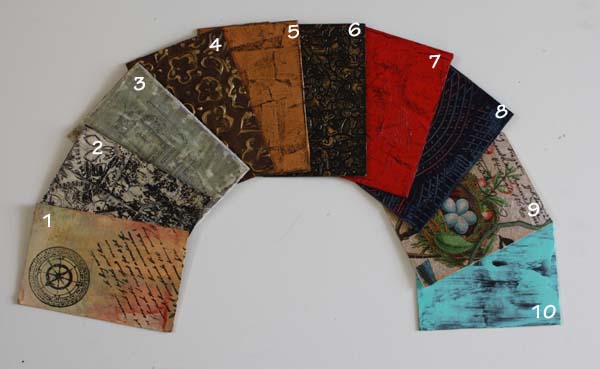
Here are some simple backgrounds and effects you can use with your journalling, collage etc.
|
|
I have given quick & simple instructions for the first three... The others will come soon.
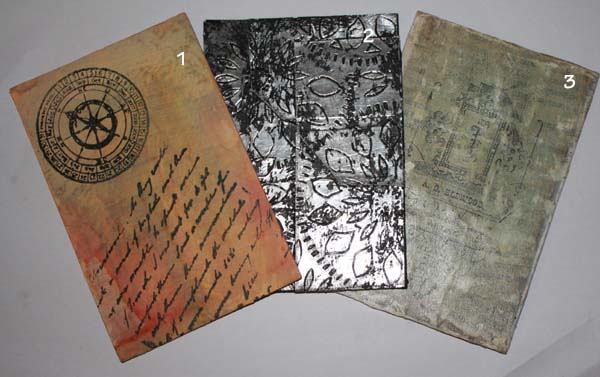
1.Alcohol dyes & stamping.
Paint the background with white paint or gesso and let dry. (Gesso has more bite and holds the ink better). Spray with 2 or 3 complimentary alcohol dyes, stand your piece up so they just dribble down, easy peasy, let dry then stamp with your favourite stamps.
2. Aluminium tape (you can get this at $2 shop or similar) embossed with a ball point pen then highlighted with paint.
Cut strips of aluminium tape, and place randomly over the entire background making sure you press it down firmly. Use the nib of a ball point pen to emboss a design in to the metal tape. I used an old plastic doily as a stencil but you can draw or write freehand. Paint over the entire piece with black or dark brown acrylic paint. Let dry then rub some of the paint off leaving accents in your design.
3. Ripped paper, and image transfer.
This one is a bit hard to see in the photo but it is a really cool effect. The background is completely covered with ripped paper to give it texture; I used a written page from a book. Use PVA or gel medium to glue the pieces of paper on to the background. When dry cover with gesso, make it thick in some places and thinner in others so the writing on the paper shows through. Now it is ready to put your image transfer on. If you don’t know how to image transfer we will go over that at a later date. You can stamp it instead or just use as is. Whatever you choose to do make sure it is completely dry because now you need to take some medium grade sandpaper and gently sand the surface to distress and age it. The more layers of paper underneath the better the finish.
