|
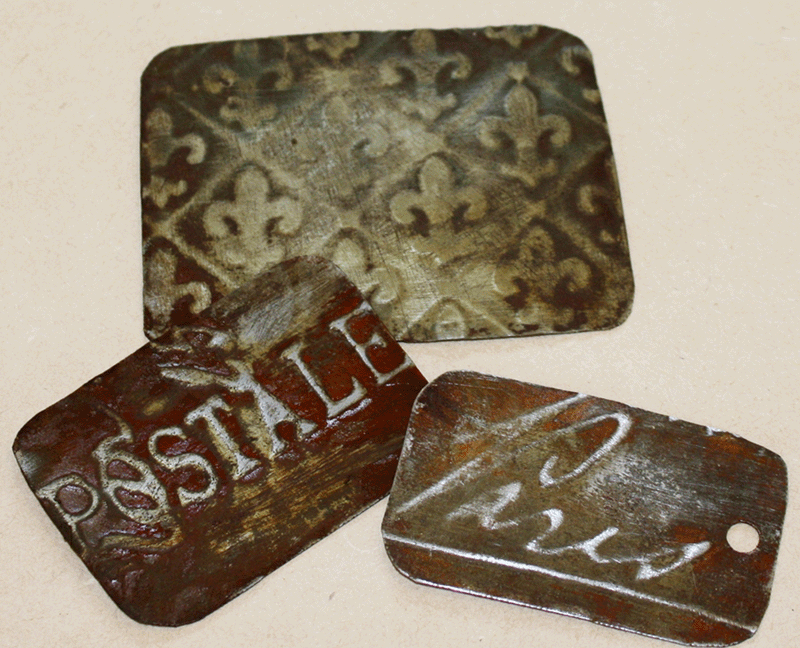
I think these rusty Metal tags I made are so cool!
I cant remember where I saw this but thankyou anyway. You can make some rusty metal tags for your journalling, scrapbooking, altered books, collage. or just because you like them. A bit smelly to make, but really easy from things around the house. I used an old piece of galvanised metal I found in the garage but you can use old tins or just about anything metal. ( not stainless steel) Make sure you read the instructions first so you have your gloves, tongs and a well ventilated area ready before you start. Have a go and see what you come up with. |
|
For this tecnique you will need: bits of metal, tin snips, course and medium sandpaper, tongs, protective gloves, a plastic container suited to the size of your bits of metal, ordinary household bleach and some white vinegar. Every time you do this the results will be different but they will all be great.
Although the materials used are ordinary household products be sensible and safe at all times. This is best done outside or at least in a very well ventilated space.
Play safe & have fun.
Although the materials used are ordinary household products be sensible and safe at all times. This is best done outside or at least in a very well ventilated space.
Play safe & have fun.

1. Cut your metal into the size you want with tin snips. Round the corners off
so there are no sharp edges |
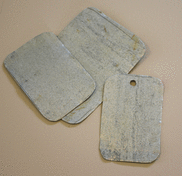
2. This is what my pieces looked like when the were cut. You can drill holes in them if you like so you can hang them.
|
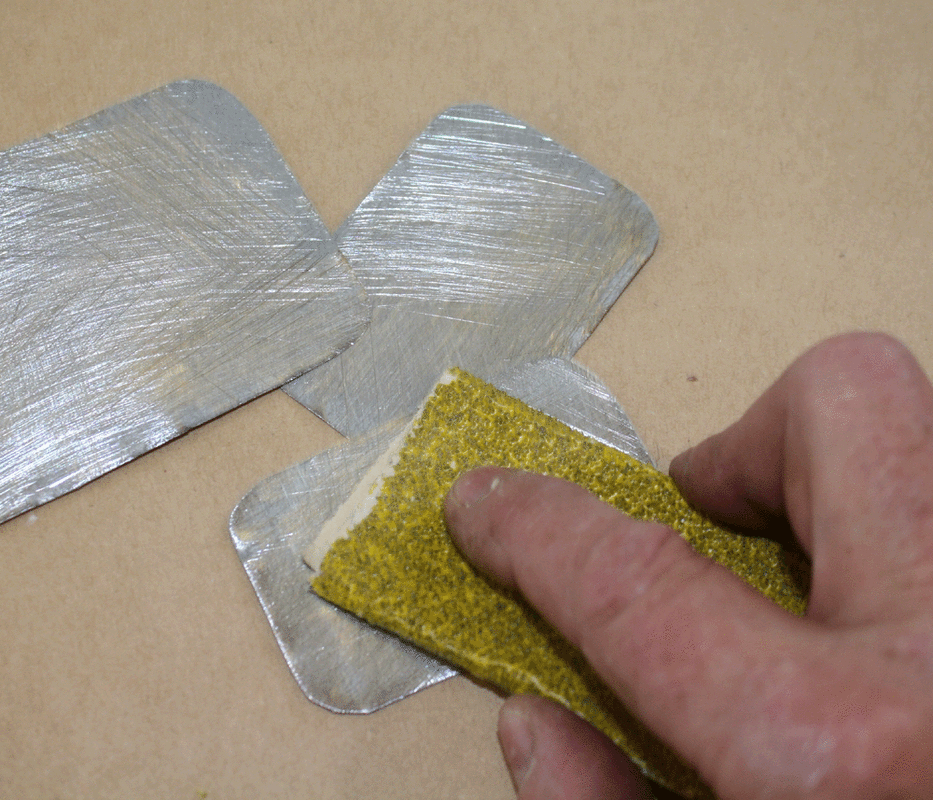
3. Using really coarse sandpaper give the metal a good sand. My metal was galvanised so I had to really scuff it to remove the galvanising so it would rust.
|
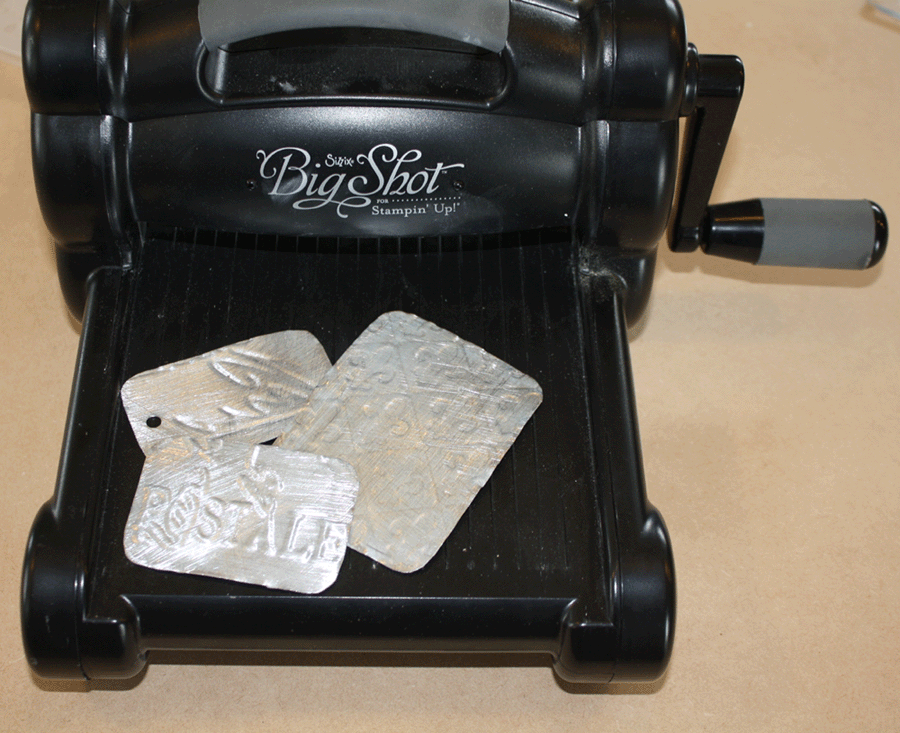
4. I used the Big Shot to emboss my metal tags but you can leave them plain or give them a few hard hits with a hammer to make dents in them, its up
to you how or if you want to distress them. |
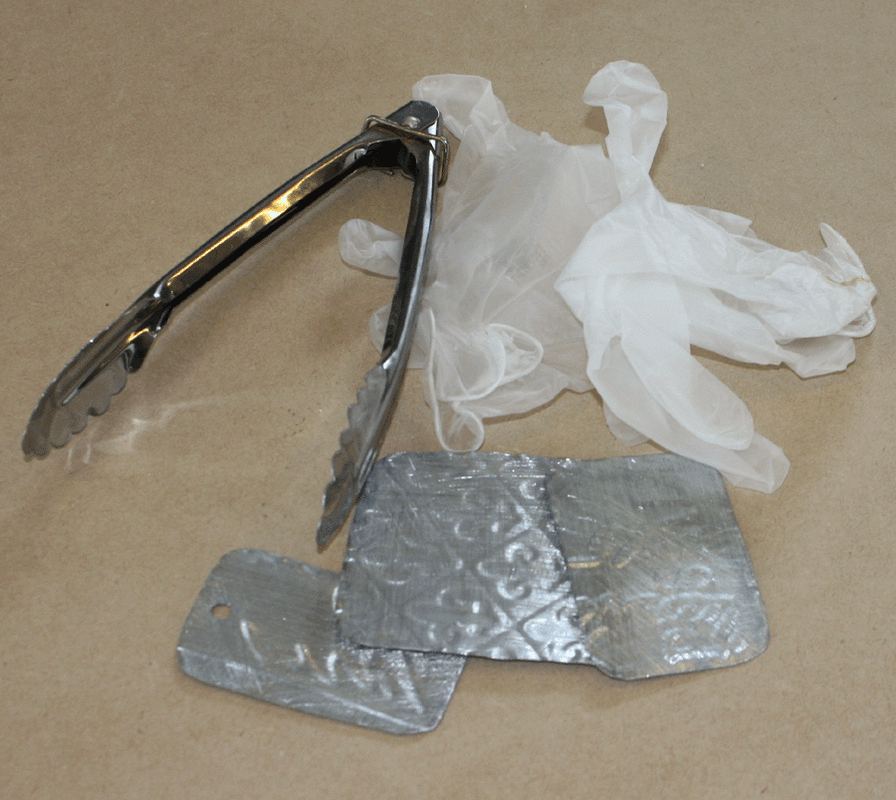
5. Make sure you wear protective gloves and use tongs for the next process as the bleach solution may irritate the skin. Its best to do this outside or in a very well ventilated area.
|
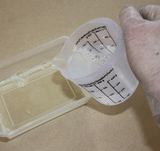
6. In a plastic container mix 1 part household bleach with 1 part white vinegar. I used 200mils of each for the size of the container I used. Be careful not to spill.
|
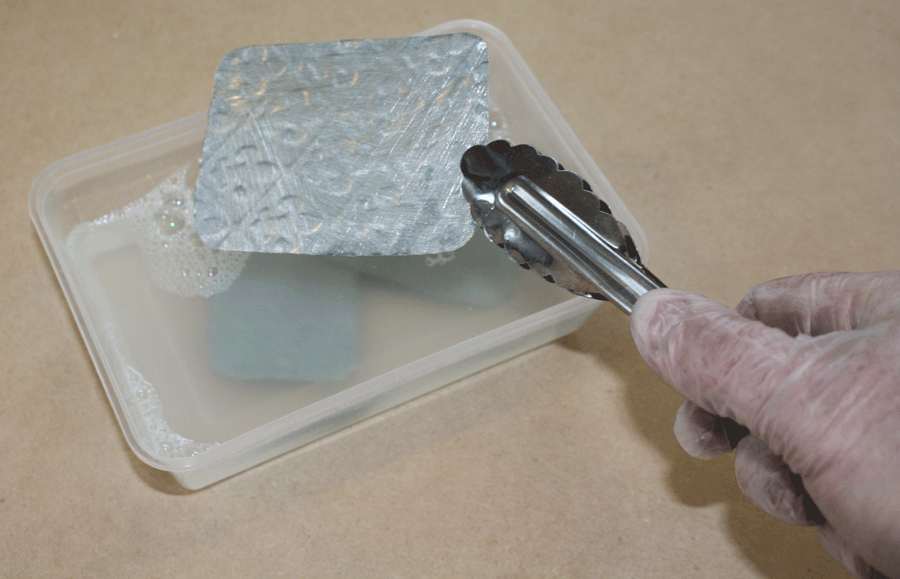
7. Using the tongs gently place the pieces of metal in the liquid. Spread the pieces out as much as you can in the container.
|
8. Place the container somewhere it is not going to get knocked over prefferrably outside or in the garage where there is no chance of anything getting damaged by the bleach,
|

9. This is the hardest part. 'Waiting'. This can take anywhere from an hour till overnight, depending on what sort of metal you have used. I find the easiest way is to do this at the end of the day and just walk away until the next day.
|
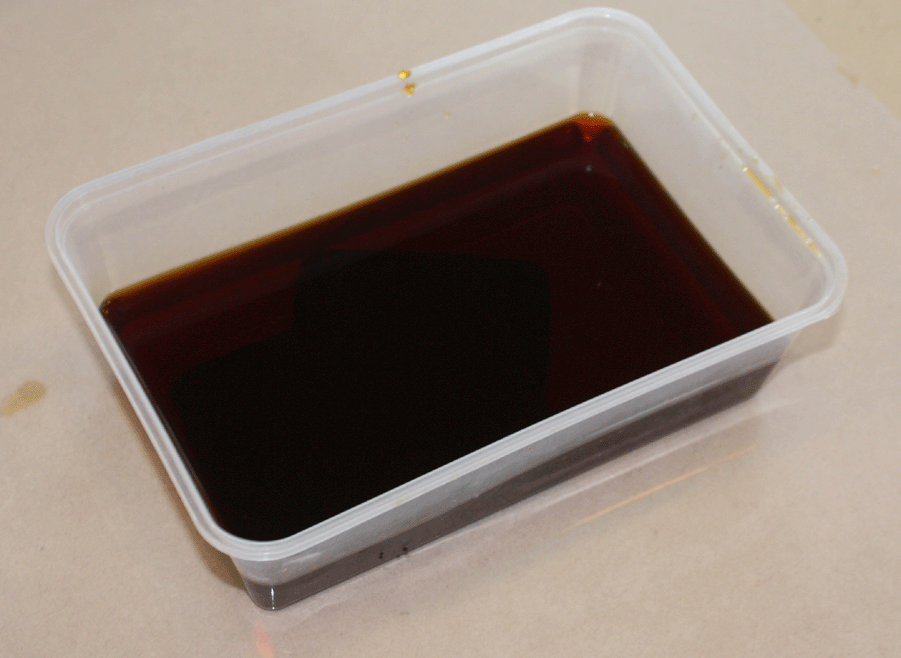
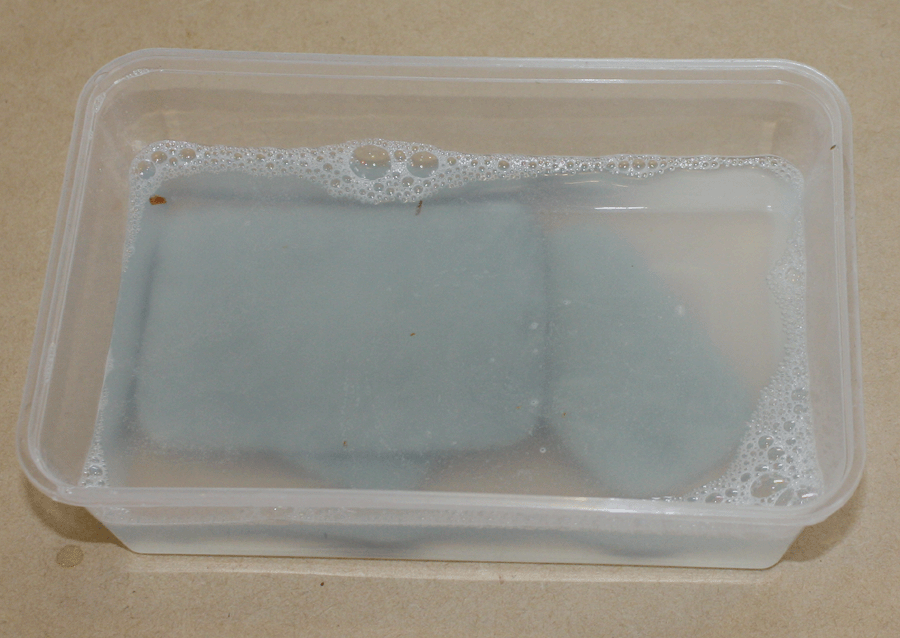
10. This is what the solution will look like at the end when the rusting is complete.
|
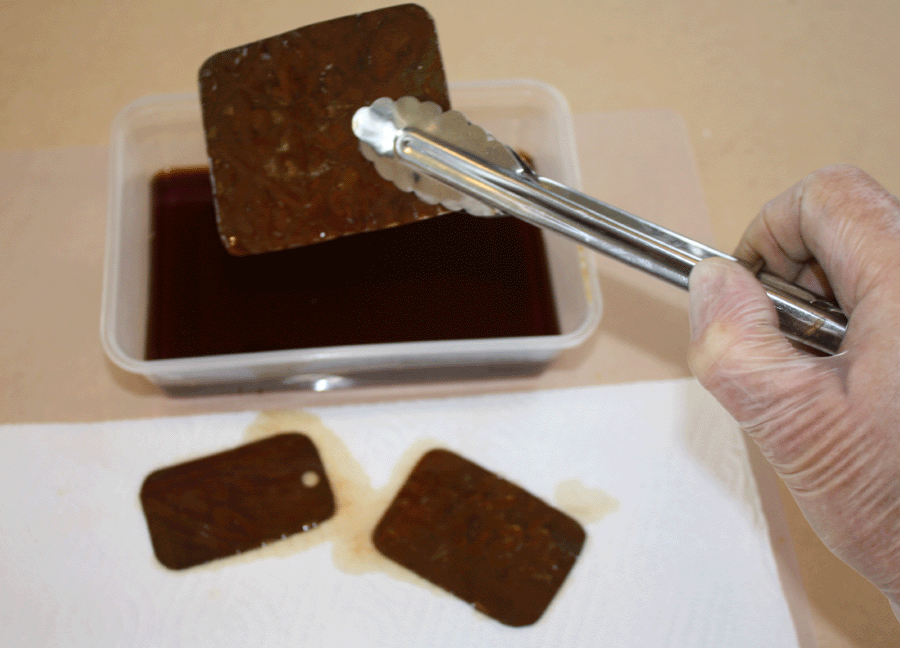
11. Again with the tongs carefully remove the rusted metal from the bleach solution and place on a paper towel. If the metal has not rusted as much as you want then just return it to the solution and wait some more.
|
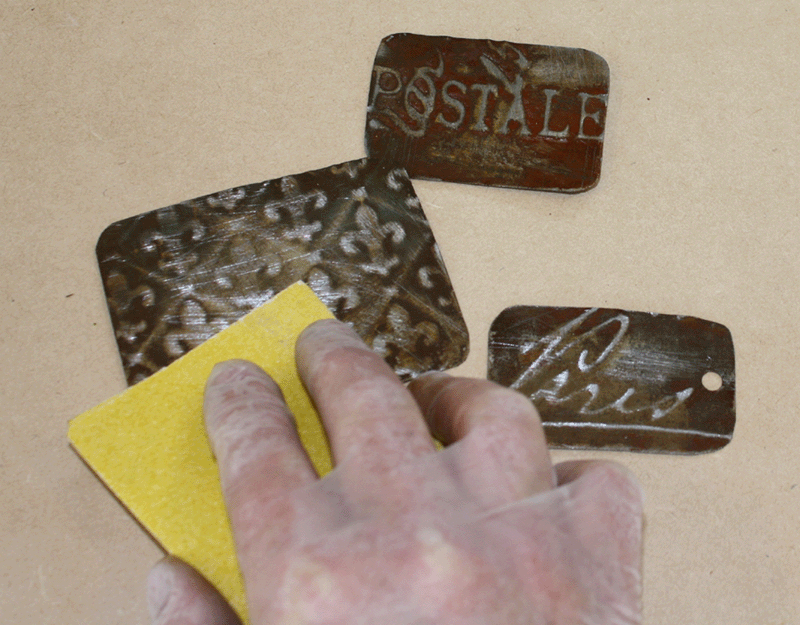
12. When it has drained the excess solotion from it, let it dry natural and if you wish to bring out the texture and distress marks more, sand with a medium sandpaper until you reach your desired effect.
|
Let me know what sort of results you get and please feel free to share any other ideas you might have.
Cheers Sue
Cheers Sue
“My future starts when I wake up every morning. Every day I find something
creative to do with my life.”
Miles Davis
creative to do with my life.”
Miles Davis
